February 28, 2012

Featured on Burdastyle! Woo hoo!

I was excited on Monday to see myself on the Burastyle homepage!
Fickle Sense on the front page


Fickle sense at the bottom of the front page


Fickle sense in the Burdastyle email.


Éxciting stuff!

February 24, 2012

Creative Friday: Creating your own prints

I have been screen printing for a few years now. I used to use stencils to print, but I now mostly use the emulsion method. I still use stencils from time to time so here is a tutorial where I share some of my printing tips.
Fickle Sense personalised screen printed totes


 MAKING UNIQUE TEXTILES THROUGH STENCILLING

materials + stencilling tips
X water proof paper If you want to use your stencil again, find some water proof paper. Go to your local art shop or design materials store and ask for water proof transperant paper. Drafting film and other transperant papers look similar to the water proof versions, so make sure that it is water proof. I have made that mistake before. It just means that the stencil will curl out of shape.

X scalpel there are numerous types of scalpels that you can use. If you intend on making a few stencils then perhaps invest in one that has interchangable blades. Check out the link to see what type of scalpels you can purchase. I have a good scalpel with a packet of interchangable blades on hand. A cutting mat is also a useful tool to have. If you don't have one, don't stress. I used to cut on top of a stack of junk mail:)

X textile paints I have used numerous textile paints. Without a doubt my favourite is Permaset. It is an Australian brand. I used to use it in Aus as it was the most common one.... but after coming to Europe and finding some other brands, I now realise how good permaset is. It is a screen printing paint so it is more thick compared to general textile paints. It is water soluable and environmentally friendly. I use it for the fickle sense products. But you can just go to your local art store and get the textile paint that they have. Here is a list of paints that I have previously used with some success. Just make sure that the paints are not too runny. Here are a few textile paint brands that I have tried. Permaset; Speedball( both for screen printing & painting); Javana Textil; Schjerning.  

Printing on dark fabrics
If you are using a dark fabric and you want a lighter print... make sure that you get a paint which can print on dark fabrics. Most manufactuers will state whether a paint can be printed on dark fabric. Permaset have named their dark fabric paint Super cover. In general, these paints will be more expensive compared to the regular paints. Keep in mind that there are some exciting textile paints out there. I love using metallics and they even have glow in the dark paints!

Stencilling mistakes
One thing which I find frustrating about stencilling is that it is quite easy to make mistakes. Pressing down the stencil whilst dabbing/rolling the paint on the textile can assist in minimising paint bleed. I also try not to  reuse the stencil too many times without washing it. If I think that there is a possibility that the paint has made it's way to the underside of the stencil, I go and wash the stencil straight away. You don't want to ruin all of you hard work.

You need: A paint brush or a small sponge or small roller; scalpel; ruler; water proof paper (or for one time use, you can use normal paper... just becareful as it soaks up the paint); an iron; textile paint; the textile; keep a sponge and some water close by.
1. CREATING THE STENCIL
Trace the stripes from your fabric onto your transperant paper with a pencil. Decide where you want to place the little squares and draw them in.


2. Use your scalpel to cut out your squares. Use a ruler (plastic or metal only) if you want to make sure that it is perfectly straight.


 3. VERY IMPORTANT. Make sure that you iron the fabric flat. No creases allowed! Next with a dabbing action paint over the desired areas. Make sure that you hold the stencil in place with you fingers to minimise the possibility of the stencil moving whilst dabbing.


4. Continue to apply colour to the desired squares. And presto! Your own unique textile.

If you want to add more colour, wash out your stencil. Wait for it to dry and apply the alternative colour.... and of course make sure that the blue paint has dried!

February 23, 2012

turquoise and coral

turquoise and coral

SOURCE


In keeping with my more "grown up" outfits, here is a concept featuring am item that I've been really into lately... the tuxedo vest! In keeping with my "new clothes resolution", I'm keen to "DIY" one. I'll just add it to my ever growing "DIY to-do" list..... aarrgh if only I could stay home and "DIY" all day........ 

And just in case you were sick of these shoes.... here they are again hahaha. Again, kind of sorry but kind of not. I just LOVE the oh-so-barely-there style of sandal (I think its a nice break from the ol' platform which, while it will always be close to my heart, has had it's fair go) and I really think that this is the best one out there at the moment. If you find some other "barely there" shoes that you love, share them with me!

Kaye xx


February 21, 2012

Creating your own textiles... primary colour style!


It's no secret that I am a major fan of colour! So I decided to add a little bit of colour to this verticle striped top. It really is easy to create your own unique textiles. All you need is a scalpel, some transperant paper, textile paint, a paint brush (or a roller or silk screen) and you are ready to go!

Within the coming weeks I will be posting some DIY textile printing tutorials. It's all pretty simple yet so very effective. Watch this space for the upcoming tutorials! 

February 20, 2012

fishnets

Photobucket
Photobucket
Photobucket
Photobucket
Photobucket
Photobucket

Photos taken in Fremantle, Western Australia

(Shirt: Madewell. Shoes: 3.1 Phillip Lim "Nina". Pants: Asos cropped trousers. Bag: Alexander Wang "Kirsten Satchel". Rings: Fashionology. Bangles: random. Fishnet stockings: borrowed from mum. Lips: Revlon "Orange Flip". Sunglasses: Elizabeth and James)


This is the millionth post featuring this bag and these shoes.... and for that I'm sorry. Actually, no I'm kind of not ;) I simply love both pieces and I'm enjoying wearing them to death... after all, isn't that what the "new clothes resolution" was all about anyway? I'm enjoying finding new ways to wear these shoes, and I was so inspired by the Alexander Wang Fall 2012 RTW collection, that I just couldn't help but spruce them up with some skanky ol' fishnets. These particular fishnets are just oh-so-barely there, just like the shoes! What a perfect match. I originally bought these pants for work to replace the ones I lost (seriously, how the hell do you lose a pair of pants???), but decided to wear them in a casual outfit before they get basketballer's sweat and swimmer's chlorinated water all over them. Lately I've been dressing slightly more sophisticated and "grown up" than what I normally would.... and I like it!

Kaye xx


February 18, 2012

instructions for my Isabel Marant DIY top

Photobucket

As promised, here is the tutorial for my Isabel Marant inspired DIY shirt. 
I used this youtube video to sew my patch pockets. Here's the way that I did it:

Photobucket

1. Select your material
I bought a chequered shirt from cotton on for about $20.
I then found some fabric from Spotlight that "clashed" with the coloured checks on the shirt. The fabric was only 75c!

Photobucket

2. Unpick the pockets
This shirt already had pockets so I unpicked them, ready to be replaced with my "clashing" pockets.

Photobucket

3. Sew the top
I drew a template and outlined it on the fabric, ready to be cut.
I then sewed the top section of the pocket.

Photobucket

4. Pin and iron
I pinned about a 1cm seem around the other three edges, and ironed the edges to keep my pocket flat.

Photobucket

5. Secure and sew
I then secured my pocket on wit a bobby pin or two and simply stitched around the three edges.

So at the end of the day, I made a shirt for around $20.75, when the real deal cost $300.
WIN!

Kaye xx

February 16, 2012

Isabel Marant DIY top

Photobucket

This tutorial has been a loooong time coming!
I've been obsessed with this Isabel Marant shirt ever since I first saw the runway images on style.com. As part of my "new clothes resolution", I'm going to ask myself questions 2:

2. Is it possible to DIY? If so, would I be just as happy with my own creation? 
Answer: Yes and yes.

Photobucket
Photobucket
Photobucket
(Shirt: DIY. Shoes: 3.1 Phillip Lim. Shorts: Freez. (<------ seen waaaaay back here). Sunglasses: River Island) 

So here it is!! My DIY Isabel Marant shirt.
You can tell by my hair and the lens used in these photos that these were taken a while ago.... like I said, it's been a long time comin'!!

I'LL POST THE TUTORIAL TOMORROW! PROMISSSSEEE!

Kaye xx

February 14, 2012

An update on my sewing progress

It has been a while since my last outfit post. Things are really busy at the moment so it has been difficult trying to find the time to sit down in front of the sewing machine for a concentrated amount of time. BUT after spending a few nights and weekends slaving away I have some pieces to ....talk about. I still need to photograph them, so here is a sneak peak of a Burdastyle inspired ensemble.

1. A brocade jacket with a boned cuff.
2. A simple tank top with a floral pocket
3.Burgandy coloured high waisted shorts.   


February 12, 2012

red-orange-red-orange red-orange.....

Photobucket
Photobucket

(Shoes: 3.1 Phillip Lim "Nina". Sunglasses: Asos. Bag: Alexander Wang "Kirsten" satchel. Dress: Asos)


This dress has helped me whisk through every social occasion over the last couple of weeks. From breakfast with the boy, to catch up drinks at a girlfriend's house, to dinner at The Garden with friends. And let me just say that I am obsessed with this orange-red shade lately (these jeans have had a number of appearances on the blog already).

If you follow us (or should I say ME) on Instagram, you would have seen these sunglasses make their debut already. If you are connected to the Instagram machine via the Internet machine via your iPhone machine, you can follow away!! Typey-type @fickle_sense to find me..... and don't be a stranger. Say hi!!!

Kaye xx

February 08, 2012

Run DMC

Photobucket
Photobucket
Photobucket
Photobucket
Photobucket

(Top: second hand. Shorts: Sportsgirl. Vest: second hand. Shoes: Friend Of Mine Hutton Boots. Bag: Alexander Wang Kirsten Satchel)

Three Things I Would Like to Point Out in This Post

ONE
My new lens! It made it's debut in the last post. My new f1.4 makes oh-so-slightly-distant things look oh-so-creamy. Why did I not purchase it sooner?!

TWO
My second hand Run DMC tank. I was at a friend's house and she pointed to a rack of clothing.  "Want dibs on any of this stuff before I sell it at the markets?" This top dangled on the edge of the rack. While I mumbled about how I loved it's grotty, worn raw-edged goodness, I shoved it into my bag.

THREE
My new hair cut. Blonder, shorter. 
I'm not sold. 
What do you guys think?


Kaye xx

February 05, 2012

my Fickle Sense "K" bag - test run to the Kalamunda markets

Photobucket
Photobucket
Photobucket
Photobucket
Photobucket
Photobucket
Photobucket

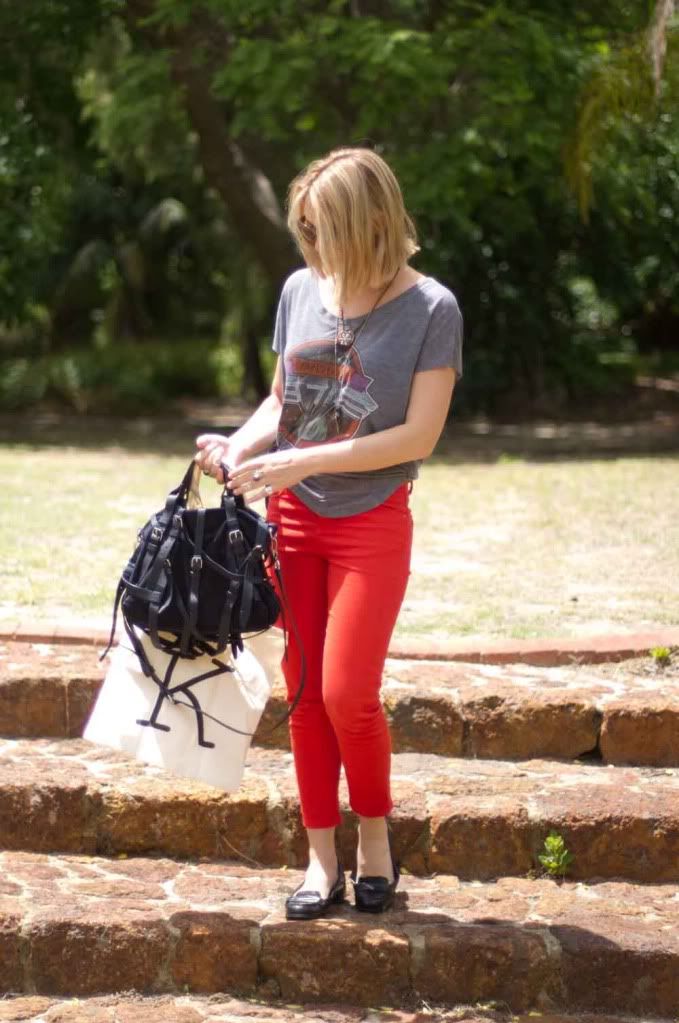
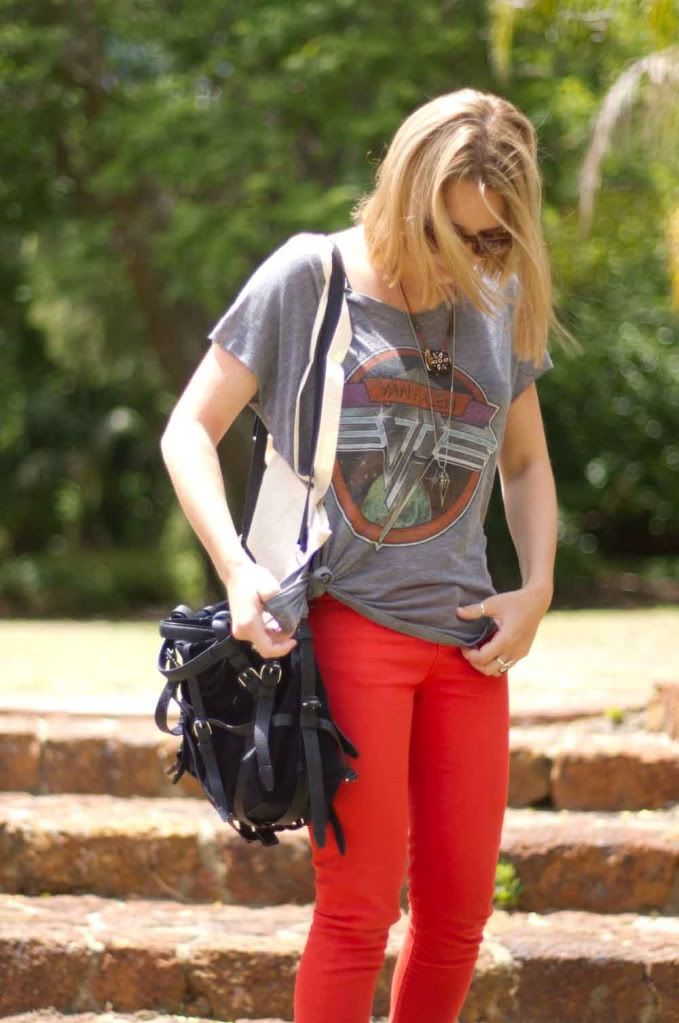
(Photos taken at the Kalamunda markets yesterday)

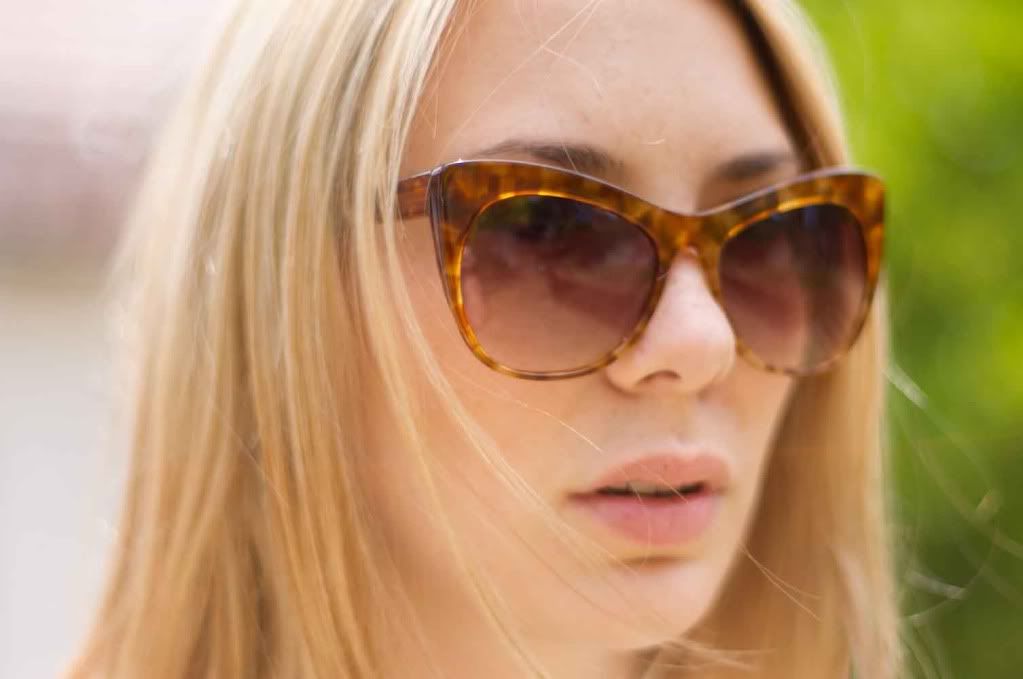
(Bag: Fickle Sense. Top: NastyGal. Jeans: Topshop via eBay < ---- worn here and here. Shoes: Asos. Bag: Alexander Wang "Kirtsen Satchel". Sunglasses: Elizabeth and James "Lafayette")

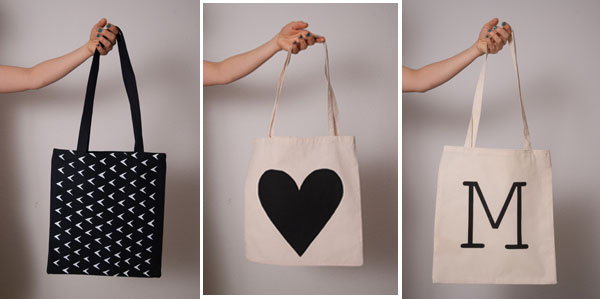
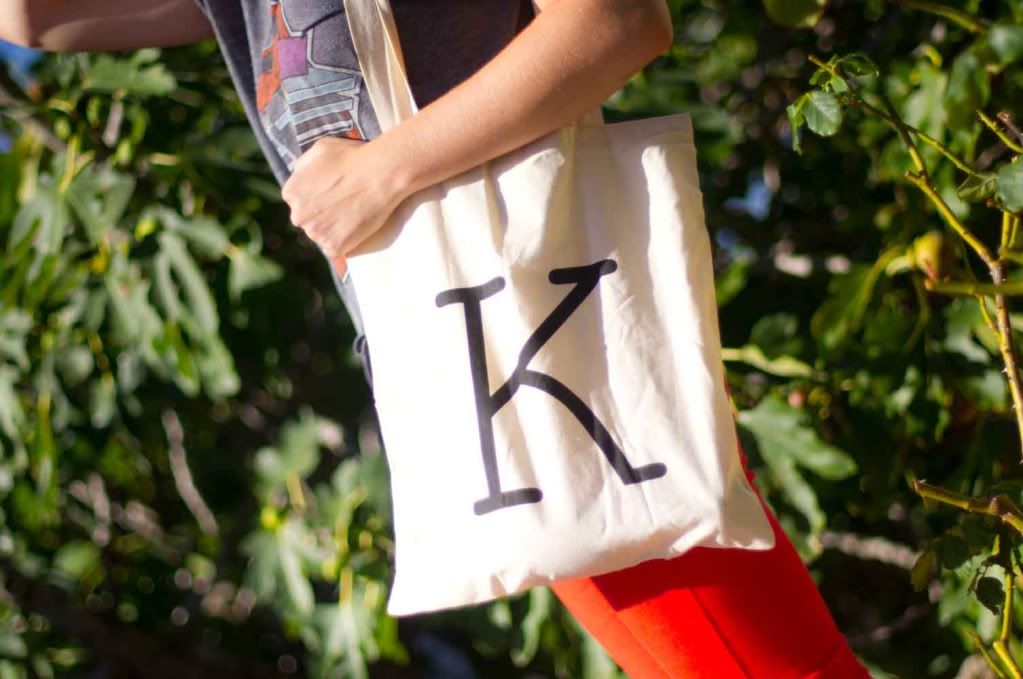
This bag is something special....

There is a crazy girl in Berlin who jumps on her bike, rides to the local markets and purchases metres of calico. She jumps back on her bike and she rides off to her little apartment. She uses eco-friendly ink to screen print a design onto the fabric that she carefully cuts to size. She spends hours transforming the material into good quality totes, being sure to reinforce, over lock, fasten and stitch it up until it's durability is ensured. 

This crazy girl just happens to be my sister, mahaila.  

When my own personalised tote arrived at my house in Australia aaaaaaaall the way from Berlin, I knew that it had a story behind it. Having known exactly what goes into each and every one of these totes - meaning not only the labour, but the passion that drives it - I'll never under-estimate the value of hand-made, eco-friendly clothing and accessories. 

Kaye xx


February 03, 2012

HAPPY BIRTHDAY MAHAILA!!!

Photobucket

HAPPY BIRTHDAY TO MY BIG SISTER
MAHAILA!!!

I'd rather be in Berlin with you right now drinking that amazing Riesling from that cool bar, eating caramel Milka chocolate, visiting the Turkish markets and consuming curry-wurst.... Damn I miss that stuff.

 I hope you're enjoying your day, German style.

Please send me more caramel Milka chocolate, I practically inhaled that bar you sent me.

Kaye xxxxxxxx

February 02, 2012

The Fickle Sense Shop! .... is finally here


Fickle Sense Etsy Shop!here

Yay! I am elated to announce that we have finally opened the Fickle Sense shop on Etsy. Yes, we're in business! I apologise for my lack of posts in the recent months, I have just been flat out making the products and setting up the shop. All products are handmade by myself and environmentally friendly.

At the moment you can choose any letter from the alphabet for a handmade screen printed tote bag. You can also find some vintage DDR button earrings in various colours!
Come and visit! And watch this space for some celebratory give aways!