February 25, 2013

How to create your own lace dress: My manual cut lace project

I recently made this dress as an experiment. As evidenced below, I am happy to report that it was well worth the time and effort. PLUS a heap of people on Fickle Sense & Burdastyle appreciated it, so I thought that I would share my process with you! 

More photos of this dress by my man (Michael) before post


I was initially inspired by laser cut lace clothing. The laser cut technology has enabled many designers to create their own style of lace... so I thought I would give this a try minus the technology. 


 Some other inspirations here 

WHAT DO YOU NEED FOR THIS 'MANUAL CUT LACE' PROJECT?
  • TEXTILE PATTERN DESIGN - You need an idea of the textile pattern that you want to create. I chose a jacquard style 
  • THIN & THICK TRACING PAPER OR CARBON TRANSFER PAPER - I use water proof tracing paper for all of my stencils. You don't need it to be water proof, but I use stencils for printing and this paper is thick enough to use it as a stencil. If you can find a large piece of carbon tracing paper or use a few smaller pieces, you could draw your design straight onto the fabric without needing to use a scalpel or cut out the thick piece of tracing paper. This is probably much easier, but I wanted to make a stencil. 
  • SCALPEL  - If you want to create a stencil make sure you have a SHARP scalpel
  •  A SLIP DRESS PATTERN - I chose this pattern as it is simple and has minimal shape & darts. I utilised the pattern from Burdastyle- Jamie Shift Dress. 
  • FABRIC - 2 x metres of course tulle; 2 x metres of a finely woven fabric which does not fray much. 
  • SCISSORS -Some sharp scissors which allow precision cutting. 
  • FABRIC MARKER 


1.Design your lace pattern. Perhaps take inspiration from textile patterns. 
e.g. 


2. Sketch out your design. If you want a symmetrical design draw only half of the design lengthways. 


3. Cut out your Shift Dress pattern pieces and make sure that the front piece is traced onto tracing paper (put this tracing paper front piece aside). Now cut your Tulle. When cutting the back omit the zipper and cut the dress on the fold so that the back looks like the image below. Sew the darts for the front piece. 


4.When you are happy with your textile design, have a look at where the darts lie. (please refer to image number 8 below to see where I placed the darts, I have marked them in yellow). Make sure that when you draw out your design on the tracing paper, draw the textile pattern to work WITH your dress pattern. 

Now transfer the 'half' design onto thin tracing paper. Once the entire design is transferred, fold the paper and draw the other half. This ensures that it is all symmetrical.

5. If you are using a stencil, transfer the final design onto the thick tracing paper and scalpel away!


6. Now that you have cut out the stencil, draw the pattern onto your cut out fabric.
7. Lift away the stencil and get those scissors out! Now start CAREFULLY cutting. If you want the inverted version for the back.... you need all pieces to stay intact! So be careful


8. ALIGN CUT OUT LACE PIECE TO TULLE. 
Now that you have your entire lace cut out. Pin and sew darts. Next you need to match up the tulle front pattern and the cut out lace darts. By matching these darts, you are able to align the garments together. Now pin, pin, pin!


9. Now carefully, starting from the middle top section, start sewing the black fabric onto the tulle. Sew close to the edge to prevent the fabric flapping away from the tulle. Sew from the middle out to the edges. Then move down the bottom section in the middle outwards. This hopefully ensures that your black fabric lies as 'bubble free' as possible.  This does take a while and feels a little tedious, BUT remember it is worth it in the end! You can hand sew some of the small pieces

 10. BACK SECTION
Now for the back section. Place your textile design next to the back section of the tulle and place the cut out pieces correctly on the tulle.


11. Pin and sew the back section. 
Once the whole back and front textiles are complete, match and sew the front section to the back. 
Now roll the edges of the neckline and sew it down. Cut the back of the neckline tulle piece so that it matches the front section. Cut the many threads. And you are finished! FINALLY!
 

12. Don't forget to make a slip. I used the same shift dress pattern, just made it smaller along the sides so that it clung to me more.

FERTIG!

February 19, 2013

my cut out lace challenge

I made this dress as an experiment. I was inspired by the laser cut lace dresses which have been around for the past year or so. So I designed the print, drew it to fit the pattern pieces. Transfered the print to black fabric. Carefully cut out the design. Sewed it to a tulle pattern piece, then .... well I will post a tutorial for the dress within the next few days! 
  
Oh and the dress was an experiment for my sisters (kaye of course) bridesmaids dress. Yes I am about to say the 'E' word. I am engaged so this will be a year of experimenting with semi formal/formal wear! Hopefully I will finish the year of 2013 with some labour intensive dresses... aka my ultimate (or ultimate for the time being) dresses.


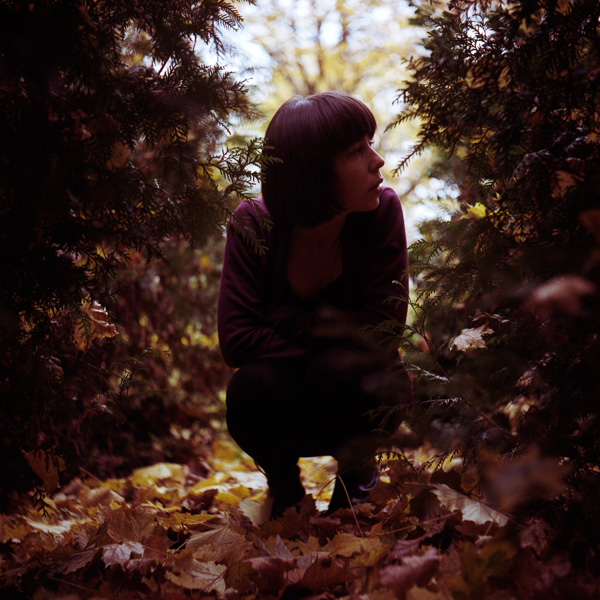
These photos were taken on two separate mornings. Luckily on the second morning the snow looked wonderful on the trees.
 
And I entered the dress into the Burdastyle competetion as the pattern is from the new Burdastyle sewing vintage modern book. It got into the top 20 looks which is nice. People are voting for it here. Perhaps I will review the book on my blog.
 
Watch this space for the tutorial for the dress!

February 07, 2013

TUTORIAL! Snood. Bring on the snood-ilicous-ness!


It is no secret that I find it difficult to sit still. I get overly excited about all of my passions. It often gets to the point where I just need to sit and rest... but still I need something to do. Knitting & crocheting are my ultimate productively relaxing past times. My grandma taught me how to knit when I was a child and my Australian football DOCKERS scarf was my first project. Go the Dockers! Of late I have spent most of my knitting and crocheting time making toys for presents for friends and family. I also started making clothing the other year when I knitted shorts for my sis kaye(you can find them here.... and I am knitting the shorts again so that I can write out the exact pattern for a tutorial. I want to spread the knitted shorts cheer! ... but it is STILL on my to do list). 

So here is the pattern for a SNOOD! I think that everyone should knit a snood. It is relaxing and once you get started you don't need to think too much. PLUS it is an awesome piece of clothing!


EQUIPMENT FOR SNOODILICOUSNESS

* Size 10 mm circular knitting needles/or double pointed needles/or regular needles (where you sew the snood together after)
* 3 x 50 g yarn
* (optional) Knitting marker of some sort. (e.g. safety pin/bought knitting marker/different coloured yarn)


This is the yarn that I chose to use
  Austermann Merino Softy - 3 schwarz here
Zusammensetzung  98% Merino Schurwolle, 2% Polyamid
Lauflänge  ca. 53m / 50g
Nadelstärke  10.0 - 12,0mm
Verbrauch  Damen Langarmpulli Gr. 38/40 M ~ 550g
Maschenprobe  8 Maschen, 12 Reihen = 10x10cm


1. Cast on 66 stitches 

2. Now that you have cast your stitches on you need to join your round. If your cable is too long you just need to pinch the cable through the stitches. Find the half way mark between your stitches, then pinch and pull the cable, which brings the stitches to a close. If this sounds all a bit confusing there is a 'magic loop youtube link here' which kind of gets at what I am trying to explain.

3. When joining the round make sure that you do not twist your knitting, otherwise you will get a twisted snood. Not  a good look.... I have made this mistake before. Just undo it and start again.


4. Once you are certain that everything is going well, keep knitting in the round, up until you reach your starting point. If you want you can place a marker here so that you clearly know where your starting point is. Now knit a round of pearl stitch. This pattern continues,

Knit a round
Pearl  a round
Knit a round
Pearl  a round

.. .until you get the width that you want. I knitted until I finished the 3 balls of yarn, which was about 58 rows. You can see in this below image that I have to constantly pull the cable through as I am knitting around.


5. Make sure that you finish off at your marker point. Cast off.


And there you have it! A cosy snood for the winter and a relaxing 'I don't have to think' project!

January 31, 2013

In love with my knitted snood:)

Winter seems to have mellowed out since the Christmas markets invaded Berlin during the Christmas cheer period, so my newly knitted snood has not been required of late. 

I knitted this snood just in time for the winter and I thoroughly recommend everyone knitting one! It was just so handy, plus I love the word 'snood'. When ever I think of the word snood it makes me smile as it reminds me of Dr. Seuss. It is such a Seussy sounding word:)

Regarding these images, Michael and I spent the night drinking GlĂĽwein (mulled wine), eating currywurst and taking photos with our usual little medium format camera in black & white. Though I am glad that the Christmas markets last for only a few weeks. You get over them pretty fast!    

SNOOD TUTORIAL COMING SOON..............
I love my snood so much that I want to spread the snoody love by posting a TUTORIAL for this particular snood. I will post it in the coming days so keep an eye out.  


Photos by Michael Dooney & mahaila

January 28, 2013

REFASHION - 2 skirts from 1

REFASHIONING THE SKIRT
I love the challenge of deconstructing clothing and making something new. I bought this old skirt a while ago and have turned it into 2 different skirts. I have not fully completed the second skirt, but here is the first one. For this version of the skirt I used the under side of the material. 

A SIMPLE JERSEY TOP
I am in the process of finalising the design for the Fickle Sense  eco tops... which will hopefully be ready within the next few months on my Etsy page. This top is a bit of a taster. 

The skirt before the refashion              The skirt refashioned


Photos by Michael Dooney


January 25, 2013

Back from home!

After a month of soaking up the warm sun rays (well, 40 degree heat  rays of sunshine) in Perth, we are now back in wintery Germany. Bbbrrrrr it is cold. My tolerance for the cold is completely shot. I hate the thought of going outside...yes I am a complete wimp! 


Margaret River, Western Australia

Kangaroo in amongst the vineyards - Kaye by photo

Back in the Berlin snow

Considering that this 
is the first post for 2013, I thought that it would be a good idea to celebrate the successes and fav finds of 2012. Starting with Fickle Sense features. 


Thanks to both both pattern booth! and KreuzbergKalender for featuring some Fickle Sense handmade items

PATTERN BOOTH 


MY FAVOURITE REFASHION  


MY FAVOURITE GIG Planning to Rock


FAVOUTITE FESTIVAL Fusion


MOST LISTENED TO BANDS ARE WARPAINT, THE KILLS, NU

The Kills


N U on Soundcloud 


December 12, 2012

Voodoo Market No. 9, Berlin Urban Spree

Last weekend we spent the day in my little stall at voodoo market @ Urban spree. It was a good day full of handmade cheer! 

My stall fickle sense 

I bought two little illustration prints from the artist ryslee!


I was really impressed with mockingbird's upcycled collection. It was by far the best upcycled clothing that I have seen! Really inspiring stuff.


 mimikri's jewellery was made from upcycled materials! I love her use of colour blocking.

Some interesting textures with the Handcraft berlin's t-shirts and singlets.

 joy's feathery designs were full of colour and she had some unique feathers

Andrea Wan worked away at her illustrations as the voodoo market goers checked out her work.

Some nice screen printed designs from the happarel guys

December 09, 2012

MUSIC: GIRL POWER! with peaches

PEACHES! The last time I saw Peaches, she was rocking her heart out with her band at the Big Day Out festival in Perth, 2007. This time around we attended a more intimate event, where she was interviewed by the CDR Berlin guys.

I have always appreciated Peaches unique and fearless approach to music making and performing. After hearing her being interviewed I definitely gained respect for her as a person as well. Her message was clear. Be yourself and express yourself through your own creative means. Take it or leave it. I found her wise words extremely inspiring and I have been listening to Peaches tracks constantly since the interview!

This was the best interview that I have seen at CDR Berlin and there were a few more girls in the audience this time too! The CDR event happens monthly (or so) and gives the opportunity for electronic music makers to hear some inspiring words from those who have 'made it' in the industry. Audience members also have the opportunity to play their tracks at the end of the night. Perhaps more girls will start going to events now that Peaches has broken the 'no females draught'. Girl Power!!! 

My dodgy photo of Peaches being interviewed.

 
'I feel cream' -PEACHES


I love this party track! 'More' - PEACHES
Love the break down, bridge section


November 28, 2012

Hounds tooth

Hounds tooth shorts. Who would have thought that these little shorts could cause me so such grief? I made these shorts a while back, but had great difficulties creating a solid outfit for them. I didn't want to make a simple black top... but this is what I ended up going with. I also made a blue chiffon top... but it still didn't quite work out. So I am still waiting for the ideal inspiration:)


Fickle Sense blue tote bag


Photos: Michael Dooney
Studio: Atelier Nalepa, Berlin

November 03, 2012

MUSIC: Planningtorock in Berlin

The other week we were lucky enough to stumble across a Planningtorock performance. Embarrassingly enough we went to the Berlinisches Gallery Kunstnacht12 without recognising who the headline artist actually was. When she started playing I went a little insane. She rarely performs, so it was quite the treat! She was one of the artists who I have wanted to see for a while.  
Take a listen! Her voice is unique and her electronic sounds provoke some solid emotions. I just love her sound:) She is certainly an inspirational artist.